Chromatography

Aim:

I want to find out how to separate colored chemicals from ink.


Research:

Paper chromatography - Wikipedia


Method:

Equipment

  • Safety glasses
  • 250mL beaker
  • water
  • pencil
  • filter paper
  • marker/felt pen
  • scissors

Instructions

  1. Get your equipment ready and be safe.
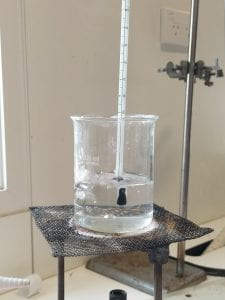
  2. Add 1cm of water into the beaker.
  3. Cut a strip of filter paper.
  4. Draw a pencil line 1.5cm above the bottom.
  5. Draw a colored dot with the marker pen in the middle of the pencil line.
  6. Fold down the top of the filter paper so that hook over the edge of the beaker.
  7. Put the the filter paper into the water so that the pencil line DOES NOT go into the water.
  8. Once the water go up the paper, take it out and let it dry.
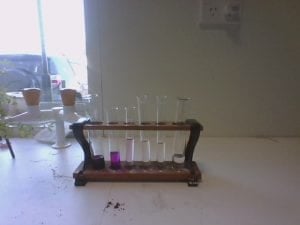
 

Results:

Discussion: 

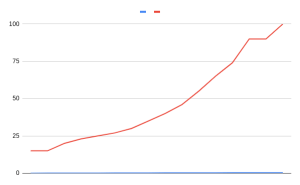
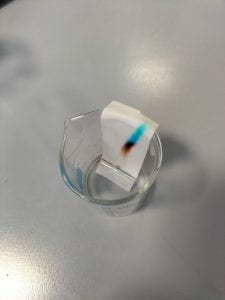
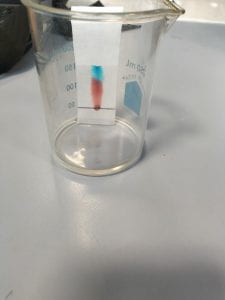
The one with the water went well. The paper started to get absorbed by the water and went on the felt pen. It was black at first then it went further up and changed into brown then black and pink mixed together then into blue. The one with propanol was similar to the experiment with the water. But instead of water it was an different chemical. When we placed the filtered paper in the 2nd experiment the propanol started to go into the paper and started changing to red, then blue. The original color we put in there was grey. But when we tried to dry the paper with the water the color started to disappear. It kinda started turning into orange. The one with propanol was much slower than the water. The propanol only went halfway while the water went although way. Now we didn’t time it but it felt like the same amount of time. But why did the colors separate? well it has to do with the chemicals that make up the color. Chemicals that make up the color are called pigments, some pigments attach to the water better than others so they move further than others. Where does the word chromatography come from? Its a Greek word, chroma for color in Greek, combined with graphy  meaning writing a record. So right now the liquid was the solvent while the paper and pen marks were the solute.


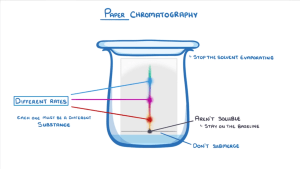
Where does the word chromatography come from? And what is it

Why did the colors separate?

Use words like solvent, solute, pigment.

Dilution of the Solution

Aim:

I want to find out how to make a concentrated solution more dilute.


Research:

Method:

Equipment

  •  Safety Glasses
  • Test tubes
  • Test Tube Rack
  • Water
  • Dropper
  • Potassium Permanganate crystal
  • 10mL Measuring Cylinder

Instructions

  1. Get your equipment ready and be safe.
  2. Fill the first test tube with 10mL of water, using the measuring cylinder.
  3. Fill the remain test tubes with 9mL of water.
  4. Put one crystal of KMnO4 into the first 10mL test tube.
  5. Using the dropper, extract 1mL of the first test tube and add it to the second test tube.
  6. Clean the inside of your dropper.
  7. Using the dropper extract 1mL of the second test tube and add it to the third test tube.
  8. Clean the inside of your dropper.
  9. Using the dropper, extract 1mL of the third test tube and add it to the fourth test tube.
  10. Clean the inside of your dropper.
  11. Using the dropper extract 1mL of the fourth test tube and add it to the fifth test tube.


Results:


Discussion:

The experiment went well we added 1mL to each tube. It got less diluted each time we took 1mL out of each tube and passed it on to the next one as you can see on the picture. Or in other words, the last one is the least diluted because we took 1mL out of each tube and put it into the next which will make it less diluted. Because there is more solvent than the solute. The most concentration one was the first one because it was the darkest and the first one. The first ever tube was 10mL and the rest of the tubes are 9mL. So as we add more water to it it got lighter and more dilute. Just so you know the most dilute means it has more solute in it and the less dilute one means that it has less solute in it. This may not make sense.

Investigating State Changes

Aim:

I want to find out how water changes from a solid, to a liquid, to a gas.


Research:

Experiment To Determine The Melting Temperature Clip - Experiment To Determine The Melting Point Of Ice, HD Png Download - vhv

Method:

Equipment

  • Beaker
  • Bunsen Burner
  • Matches
  • Ice
  • Salt is optional
  • Gause Mat
  • Tripod
  • Heat mat
  • Thermometer
  • Retort Stand
  • Clamp
  • Timer/Stopwatch
  • Safety glasses


Instructions

  1. Get your equipment ready and be safe.
  2. Set up Bunsen burner.
  3.  Fill half your beaker with ice and add a 50mL of water.
  4. Set up the stand, clamp and thermometer.
  5. Make sure the thermometer is not touching the bottom of the beaker.
  6. Measure the temperature of the ice.
  7. Light the Bunsen burner and heat the ice with a blue flame.
  8. Start timing.
  9. Every 30 seconds, record the temperature of the ice/water.


Results:

Every 30 seconds.


15 degrees

15 degrees

20 degrees

23 degrees

25 degrees

27 degrees

30 degrees

35 degrees

40 degrees

46 degrees

55 degrees (ice melted)

65 degrees

74 degrees

80 degrees

90 degrees

100 degrees (started boiling, turned the gas off)


Here is the best graph we could do.

TIME TEMP
0 15
0:30 15
1:00 15
1:30 20
2:00 23
2:30 25
3:00 27
3:50 30
4:00 35
4:50 40
5:00 46
5:50 55
6:00 65
6:50 74
7:00 90
7:50 90
8:00 100


Discussion:

This experiment went well because the ice melted then boiled. The whole experiment was to melt ice or changes in state.  So as the temperature got higher the ice started to get hot and melt and then it turned into water. At a certain temperature the ice completely melted at 55 degrees. We used a Bunsen burner so it probably effect the temperature and went faster because it was one a blue flame and blue flames are hotter. If you just used a lighter it would be a lot more slow because it is not a blue flame. Also when the water starts boiling it forms bubbles, the reason for this is because the heat from the Bunsen burner is transferring heat energy to the water molecules. Then making the water molecules begin to move quickly. Then eventually the water molecules have too much energy to stay connected to the liquid. Then forms gaseous molecules of water vapor and it will rise to the surface.